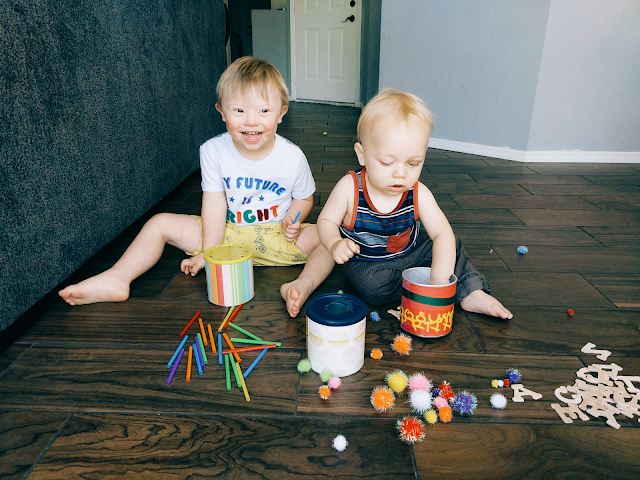
DYI Therapy Games
If you're like me, then you want to buy all the therapy tools for your child - but they can be pricey! I made these games a few months ago and my boys absolutely love them! The best part was how cheap it was to make them; the straws and pom games were only a dollar and the alphabet game was only 3 dollars!!
I recently took the games with me on a trip and while we were waiting at the airport they were completely entertained as we waited for our plane to arrive. It was so great to have an activity that calmed the boys down before the flight rather than me having to chase them around the airport. These games are great for fine motor development but also for learning colors and the alphabet. They are super easy to make, easy to take anywhere, or great to just play at home.

Straws
Supplies:
- A container; I used my son baby puff container but you could use anything like an old sour cream, butter, or yogurt container. Might want a taller container for this game.
- A single hole punch
- Scissors
- Straws (you can buy a pack of 100 straws at any grocery store for $1)
1. Take the lid of the container and hole punch many holes as you like.
2. Measure the inside of the container with a straw and cut straws at the length. I used about 25 straws.
3. (optional) decorate the outside of the container and label.
Poms (ball)
Supplies:
- A container
- Poms (I linked an assorted pack. I like to use the assorted pack because it helps Jed with his fine motor skills of punching the different sizes of pom poms but you can use the same size.
- Scissors
- Marker
1. Take the largest pom and trace the size on the lid of the container.
2. Cut the traced circle
3. (optional) decorate and label
Supplies:
- A container
- Alphabet Letters
- Marker
- Straight edge (a piece of paper works great)
- Exacto knife
1. Take the lip of the container and with a marker and straight edge draw a line approx. 1.5 inches.
2. Very close to the previous line drawn, draw another line identical, connect the two lines making a long rectangle. The alphabet letter depth should be able to fit inside.
3. Take the exacto knife and cut out the rectangle just drawn.
4. (optional) decorate and label.
Tip - If traveling with the games, put a ziplock bag inside of the container so it catching the pieces and avoids massive spills of tiny objects.
That is it! I hope your kiddos enjoy them as much as my boys!!


Comments
Post a Comment